The Raspberry Pi Camera Module
Introduction
In this post we'll look at the Raspberry Pi camera module, a low cost hardware module that supports still picture and video recording and is the first official hardware add-on for the Raspberry Pi. We'll also look at the camera's features and specifications, how to set it up and examine the software that supports it.
This post is based on a lightning talk I gave at Qt Developer Days 2013, updated with some additional information since then.
Camera Details
Since 2012, the Raspberry Pi Foundation had been reporting that an official camera module was in development. In May 2013, an announcement was made by RS Components and Premier Farnell/Element 14, distribution partners of Raspberry Pi, that the camera module was available (it is also available from other sources) and sells for retail €30 or US$25.
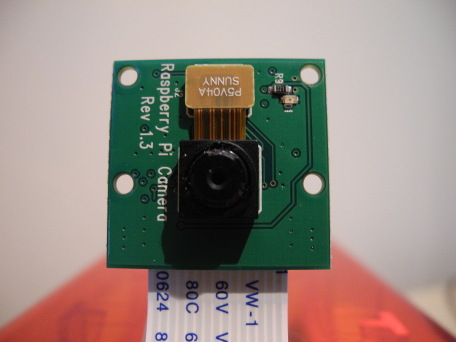
The camera consists of a small (25mm by 20mm by 9mm) circuit board, which connects to the Raspberry Pi's Camera Serial Interface (CSI) bus connector via a flexible ribbon cable. The camera's image sensor has a native resolution of five megapixels and has a fixed focus lens. The software for the camera supports full resolution still images up to 2592x1944 and video resolutions of 1080p30, 720p60 and 640x480p60/90. The camera module is shown below:

Installation involves connecting the ribbon cable to the CSI connector on the Raspberry Pi board. This can be a little tricky, but if you watch the videos that demonstrate how it is done, you shouldn't have any trouble.
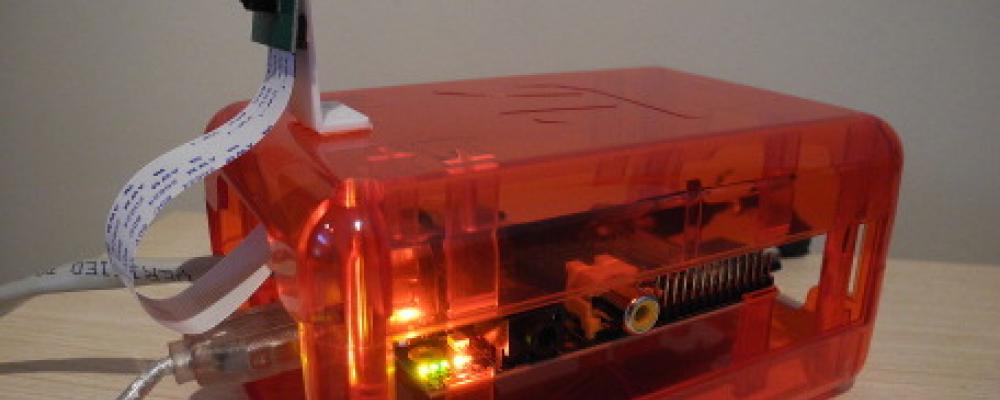
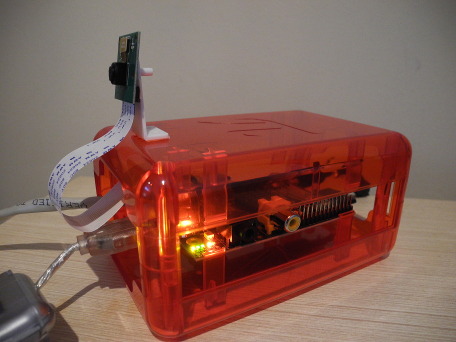
When you purchase the camera, you will receive a small camera board and cable. You'll want to devise some method of supporting the camera in order to use it. Some camera stands and Raspberry Pi cases are now available. You can also rig up something simple yourself if you wish. I attached mine to a case using a small piece of plastic and double-sided tape, as shown below:

Once the hardware is set up, you can move on to configuring the software.
Software
Since its inception, the camera is supported in the latest version of Raspbian, the preferred operating system for Raspberry Pi. The instructions in this blog post assume you are running Raspbian. The first step is to get the latest Raspberry Pi firmware, which supports the camera. You can do that from a console by running:
    sudo apt-get update
    sudo apt-get upgrade
You then need to enable the camera from the Raspberry Pi configuration program by running:
sudo raspi-config
Choose "camera" from the program and then select "Enable support for Raspberry Pi camera". You should then reboot when prompted by the raspi-config program. The camera will be enabled on subsequent boots of the Raspberry Pi.
Several applications should now be available for the camera: the rapistill program captures images, raspivid captures videos, and raspiyuv takes uncompressed YUV format images. These are command line program. They accept a number of options, which are documented if you run the commands without options. Several examples are given here1. That reference also describes some more sophisticated things you can do, like streaming the video over the network and viewing it on another computer.
The following shell command runs the video capture program with a preview showing all of the built-in camera effects and makes for an interesting demonstration:
    for effect in none negative solarise sketch denoise emboss oilpaint hatch gpen pastel watercolour film blur saturation colourswap washedout posterise colourpoint colourbalance cartoon
    do
        echo $effect
        raspivid -d -ifx$effect
    done
If you want to examine the source code for the programs, report bugs or compile them yourself, they are maintained at the project on github.com2. You can either cross-compile or build the tools natively on the Raspberry Pi.
User Space V4L2 Driver
The camera drivers are proprietary in the sense that they do not follow any standard APIs. That means that applications have to be written specifically for the Raspberry Pi camera. Under Linux, the standard API for cameras (including web cams) is V4L (Video for Linux), and a number of applications have been written that support any camera with a V4L driver. An independent developer has now written a user space V4L driver for the Raspberry Pi camera, which is available from here3. With that driver, you can use generic Linux applications written for cameras. The driver has a few limitations: it is closed sourced, and can be a little slow because it runs as a user program rather than a kernel driver. The program worked reasonably well when I tested it and it is expected to continue to improve.
Official V4L2 Driver
Recognizing that a V4L driver is needed, the Raspberry Pi Foundation reported that they were working with Broadcom to develop an official kernel V4L driver. As a kernel driver, it should be faster than the user space driver. The official driver became available in December 2013. The driver is still quite new and not many people appear to have tried it yet. The latest Raspbian distribution and latest Raspberry Pi boot firmware is required for use. You will also need to build some code yourself. If you want to try it, some brief instructions showing the commands to build it are listed below (these commands should be run from a shell).
    # Get the latest Raspbian packages
    sudo apt-get update
    sudo apt-get upgrade

    # Get the latest firmware
    sudo rpi-update

    # Get the source code for the V4L utilities
    git clone git://git.linuxtv.org/v4l-utils.git
    cd v4l-utils

    # Install some packages needed to build it
    sudo apt-get install autoconf gettext libtool libjpeg62-dev

    # Configure and build it.
    autoreconf -vfi
    ./configure
    make
    sudo make install
Building the software should take about fifteen minutes. You need to have the camera enabled and sufficient Graphics Processing Unit (GPU) memory configured. Here are some example commands to get started:
    # Load the module
    sudo modprobe bcm2835-v4l2

    # Control the viewfinder
    v4l2-ctl --overlay=1 # enable viewfinder
    v4l2-ctl --overlay=0 # disable viewfinder

    # Record a video
    v4l2-ctl --set-fmt-video=width=1920,height=1088,pixelformat=4
    v4l2-ctl --stream-mmap=3 --stream-count=100 --stream-to=somefile.264

    # Capture a JPEG image
    v4l2-ctl --set-fmt-video=width=2592,height=1944,pixelformat=3
    v4l2-ctl --stream-mmap=3 --stream-count=1 --stream-to=somefile.jpg

    # Set the video bitrate
    v4l2-ctl --set-ctrl video_bitrate=10000000

    # List the supported formats
    v4l2-ctl --list-formats
In theory, any camera application written to use the V4L APIs should work with the driver. I encourage you to try it out and report all positive or negative outcomes back to the developers.
Qt Support
TThe Qt Multimedia module under Linux supports cameras that have V4L drivers. Using the user space driver with Qt 5.1, a couple of simple QML camera example applications4 that I had written earlier were able to run and correctly show the video preview. At higher resolutions, I did see the applications hang. These appeared to be driver related because reinitializing the driver using the v4l-ctl command got it working again. At lower resolutions (e.g. 256x256), it seemed to work reliably.
I have not yet had a chance to try the Qt Multimedia module with the new kernel mode V4L driver.
Other Hardware
As well as the official Raspberry Pi camera module, other cameras supported by Linux, most notably many USB webcams, should work on the Raspberry Pi.
Summary
The Raspberry Pi camera module is small and inexpensive. It is supported by its own command line applications for still pictures and video, with standard Linux V4L drivers in preview form. You can expect to see more applications developed to make use of the camera, as well as hardware add-ons like cases. Already users have developed a number of interesting applications. For example, removing the built-in lens allows it to operate as a macro camera for close-up images and some people have exploited this feature.
Some users have mounted cameras using one or more servos so the camera can rotate under software control. A Raspberry Pi with camera and GPS, installed inside a Raspberry Pi stuffed bear mascot, has even been launched by balloon5 to the edge of space. If you are interested in machine vision applications, the free OpenCV6 library is available and supports features like object tracking and face detection.
Like most cameras, the Raspberry Pi camera has an infrared blocking filter installed so that it more closely matches the response of the human eye. A version of the camera without this filter, the Pi NoIR7, is also available and can be used for applications where infrared detection is useful, like wildlife photography and botany.
References
- www.raspberrypi.org/camera (Raspberry Pi Camera Installation and Basic Usage Website)
- github.com/raspberrypi/userland/tree/master/host_applications/linux/apps/raspicam (Source Code for Camera Applications Website)
- www.linux-projects.org/modules/sections/index.php?op=viewarticle&artid=14 (User Space V4L Driver Website)
- www.ics.com/blog/qt-5-multimedia-qml-elements (The Qt 5 Multimedia QML Elements, Jeff Tranter)
- www.raspberrypi.org/archives/4733 (Babbage's Big Jump: The Aftermath, Raspberry Pi Website)
- opencv.org (OpenCV Project Website)
- www.raspberrypi.org/archives/tag/pi-noir (Pi NoIR, Raspberry Pi Website)