
An Introduction to the Qt Installer Framework
As the first interaction a user will have with your desktop application, critical, necessary and hopefully welcoming, an installer is often overlooked and in need of some love. So to give it its necessary due, here's an overview of a tool that may help: the Qt Installer Framework.
Installing the Installer
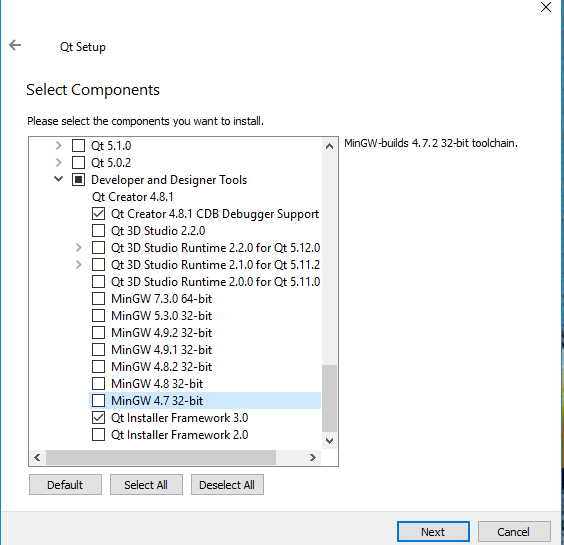
The pre-built version of the framework comes with Qt; you just need to check “Qt Installer Framework 3.0” on the components page of Qt’s installation program. And yes, if you’re wondering, Qt’s own installer was implemented using this framework.
It is also available here as a separate module. For the more adventurous, the module can be built from its source hosted in this git repository. It requires to be statically linked to Qt.
An Example
Once it’s all setup, in the bin directory of the framework, the program binarycreator can generate a customized installer for any Qt application. To illustrate its usage, here's an example of a small qmake project where the generation of the application’s installer is part of the build. This particular example has been tested on Windows, with Qt 5.11.2 and the MinGW compiler. The framework is however cross-platform and porting this example to other platforms should be seamless, only involving the deploy tool briefly addressed later in this blog. It is hosted in the git repository here.
Build the project and the following happens:
-
An application is built and placed in a specific data directory.
-
This directory is made deployable by adding to it the necessary Qt libraries.
-
An installer for the application is then generated.
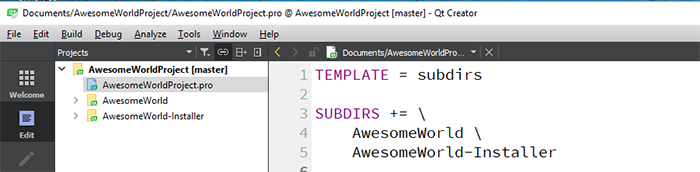
The structure of the project has two directories, one containing the source of a simple Qt application named AwesomeWorld, and the other containing the source of the installer that packages it.
The pro file of the AwesomeWorld directory has a directive to place the built application in a specific location:
DESTDIR = $$PWD/../AwesomeWorld-Installer/packages/ics.component/data
It is the contents of this specific location that is packaged into an installer by invoking binarycreator in the pro file of the AwesomeWorld-Installer directory:
INPUT = $$PWD/config/config.xml $$PWD/packages
INSTALLER = awesomeWorld-installer
awesome-installer.input = INPUT
awesome-installer.output = $$INSTALLER
awesome-installer.CONFIG += target_predeps no_link combine
awesome-installer.commands = $$QT_INSTALL_FRAMEWORK_PATH/bin/binarycreator --offline-only -c $$PWD/config/config.xml -p $$PWD/packages ${QMAKE_FILE_OUT}
QMAKE_EXTRA_COMPILERS += awesome-installer
The pro file in the example assumes that the Qt Installer Framework is located in C:/Qt/Tools/QtInstallerFramework/3.0. You can modify it to reflect your development environment by changing it in the pro file.
QT_INSTALL_FRAMEWORK_PATH = C:/Qt/Tools/QtInstallerFramework/3.0
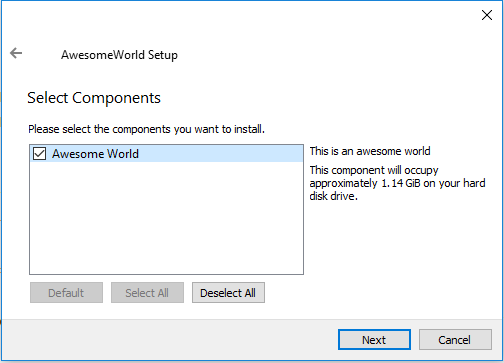
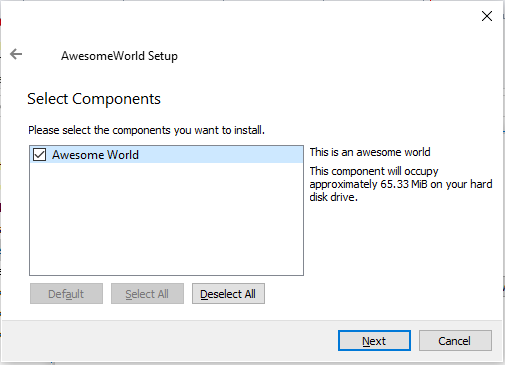
For each subdirectory in packages, the program binarycreator bundles up the contents of the data directories into the installer. This is done through the option -p $$PWD/packages. In our example, there's only one package: ics.component. The resulting installer awesomeWorld-installer.exe when run, presents the bundled-up packages on its components selection page.
There is also a directive in the pro file of the AwesomeWorld-Installer to make the contents of the data directory deployable. The windeploqt application that comes with Qt adds to this folder the Qt-related dependencies required to run any application it contains on any Windows desktop regardless of if Qt is installed or not. The equivalent on Mac is the macdeployqt tool that also comes with Qt.
DESTDIR = $$PWD/../AwesomeWorld-Installer/packages/ics.component/data
create_package.commands = $$quote(windeployqt --qmldir $$PWD/../AwesomeWorld $${DESTDIR})
QMAKE_EXTRA_TARGETS += create_package
PRE_TARGETDEPS += create_package
In the ics.component package folder is also a meta directory containing the package.xml file. It lists the component’s attributes that will be displayed in the installer’s Select Components page.
<?xml version="1.0" encoding="UTF-8"?>
<Package>
<DisplayName>AwesomeWorld</DisplayName>
<Description>This is an awesome world</Description>
<Version>1.0.0-1</Version>
<ReleaseDate>2019-01-01</ReleaseDate>
<Default>true</Default>
<Script>installscript.qs</Script>
</Package>
</xml>
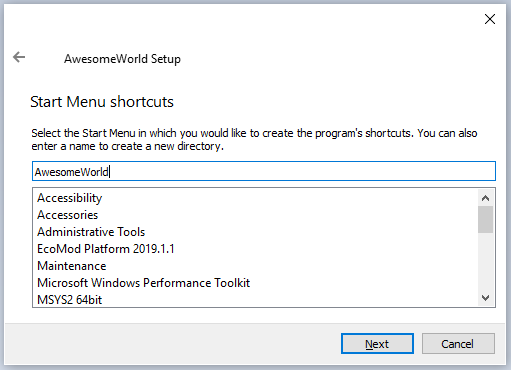
Every package should have one. Notice that for this package a script installscript.qs is listed. It specifies operations the installer must execute in order to install the component. In this case, it will add a shortcut to the Windows Start menu.
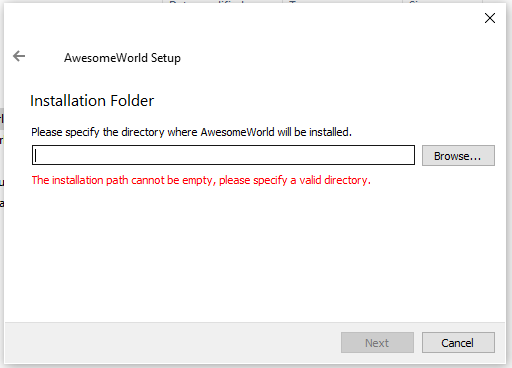
The configuration config.xml file is the AwesomeWorld-Installer main input file. It provides general customization for the installer’s UI.
<?xml version="1.0" encoding="UTF-8"?>
<Installer>
<Name>AwesomeWorld</Name>
<Version>1.0.0</Version>
<Title>AwesomeWorld</Title>
<Publisher>Me</Publisher>
<WizardStyle>Aero</WizardStyle>
<!-- Directory name is used in package.xml -->
<StartMenuDir>AwesomeWorld</StartMenuDir>
<TargetDir>@HomeDir@/AwesomeWorld</TargetDir>
</Installer>
This document lists all the attributes that can be set.
The Result
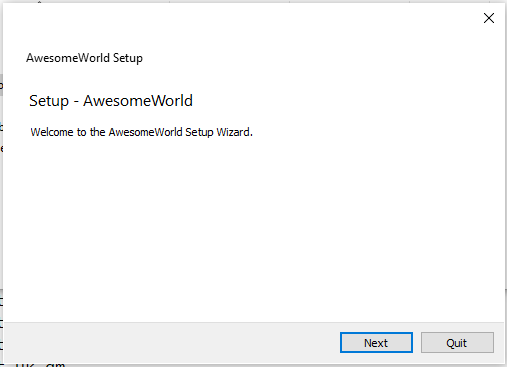
The generated installer is typical with the usual pages:
-
The Introduction page
-
The Select Directory page
-
The Select Components page
-
The License Agreement page
-
The Selecting Windows Group page
-
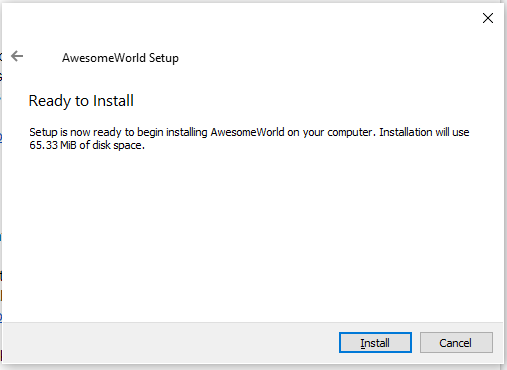
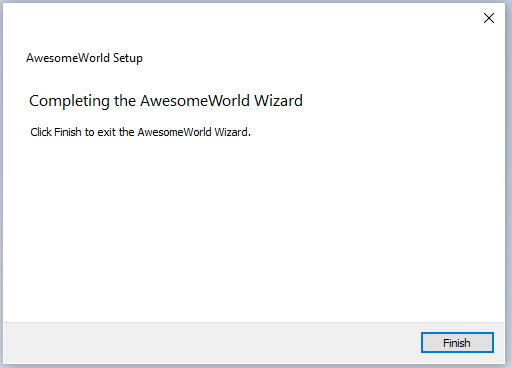
The I am Installing page
With the WizardStyle set to “Aero” in the configuration file, the individual pages look like this:

Further Customization
Customizing the installer further is limited and tricky. Thankfully, the framework provides examples that can provide some inspiration. The dynamic page example for instance replaces the default pages with its own particular user interface using ui files specified with Qt Designer:
https://doc.qt.io/qtinstallerframework/qt-installer-framework-dynamicpage-example.html
Among the attributes in the config.xml file, you can specify the name of a control script like this:<ControlScript>controlscript.qs</ControlScript>
This allows some extra functionality specified in a file controlscript.qs located next to config.xml. Here's an overview of the API using this technique.
Finally, the installer can fetch packages from an online source using the repogen tool contained in the bin directory of the framework.
Conclusion
I have successfully leveraged this framework in my Qt Windows projects. Time spent implementing an installer was minimal, as it should be since a user will only interact with an installer once, briefly. Combining it with the build process allows for an easy handover to testers. If the desired installer deviates from the norm however, customizing it may prove tricky. It is best to keep it simple!